
Showing posts with label tutorial. Show all posts
Thursday, June 6, 2013

Just for fun, i thought i'd share a before and after of the New York photo i used on yesterday's layout. What do you think? ;)And if some of you are curious about my process, i did all this in 5 minutes using Photoshop and the RadLab filter plugin from Totally Rad. I used a mix of Pool Party and Cool as a cucumber to get the color, then played with the saturation and light to get the right tone. I don't know how i did it before RadLab, but it changed my life <3
RADLAB - BEFORE & AFTER

Thursday, March 14, 2013
Hoping this has been helpful to some of you, and a couple links to finish:
BLOG READERS: BLOGLOVIN'
Hi!!
Google Reader is no more, that's now official. And a lot of you look really bummed about it and have been asking about other blog readers to use so i though i'd do this quick post about Bloglovin'!
Personally, i have never used Google Reader, so this is not a comparison. Just me telling you why i love Bloglovin' so much :)
First reason: the design is super clean and easy. A year or so ago i was looking for a blog reader to help me get organized with my reading. I did not like Google Reader, mostly because, well it wasn't really pretty, or clear. Then i discovered Bloglovin'. It was super easy so i started adding blogs to it, and now i'm using it daily, both on my computer and iPhone (yep, they have an app, free of course!)
When i say it's easy, it really is! On the main page you can see the blogs you are following and their latest posts. If you click on one of them, you'll be redirected to the blog, well the post in fact, which is way better. But you're still on Bloglovin, which means you can jump to another post of your feed anytime, no need to go back to the BlogLovin' main page! You can also comment the posts without issue this way, which is super cool!
Here's another snapshot of the main page. Once you’ve created an account you can search for and follow your favorite blogs, organize them in group however you like and also claim your own blog, so people can follow you too!

- How to claim your blog on Bloglovin’ (first link).
- How to import your Google Reader into Bloglovin' (so you don't have to start from scratch!): http://www.pricelessadventure.com/2012/04/how-i-set-up-blog-lovin.html
Also, if you ever wanted to, you can follow me here - post your link below and I’ll follow back if I don’t already!
Tuesday, November 20, 2012
TIPS FOR WRITING ON YOUR PHOTOS
![]() |
Fonts used: Mrs strange and Always Forever |
Pictures, like words, can tell the most beautiful stories. And my favorite books are by far the ones that have pictures on it. Even on our scrapbook pages, we always mix them up together looking for the perfect harmony. So why not write directly on our pictures? I realize it might sound weird or bad to some, but with some little tips on mind it can turn your pictures into way more.
TIP #1: White space.
When taking a picture, don't be afraid to leave lots of white space. Your words will fill it up. White space is neither wasted or useless. It will just make the main element of your picture stands out even more.
![]() |
Font used: Traveling Typewriter |
TIP #2: Add a layer between your photo and your text.
Some backgrounds photos are busier than other. it doesn't mean you can't add words on top. You just have to find a way to make your text stand out a little more. The easiest way to do that is paint over your layer with the brush tool available in all editing software (I'm using Photoshop CS4 to edit all of my photos). Brushes are available in all sorts of size and type. And you can also play with the colors and opacity level! After all this fun, don't forget to add your text ;)
![]() |
Spray brush in dark and light pink with 80% and 60% opacity Font used: Pointy
TIP #3: find the perfect font
I LOVE fonts! I spend way to much time on dafont, fonts and iFontMaker looking for the perfect ones. And most of you do the same on your scrapbook layouts, right? When mixing words and pictures, we search for balance and harmony, and will only stop when everything looks like it always belonged together. Well, I do the same when writing on pictures.
![]() |
Font used: Zapfino |
Friday, August 10, 2012
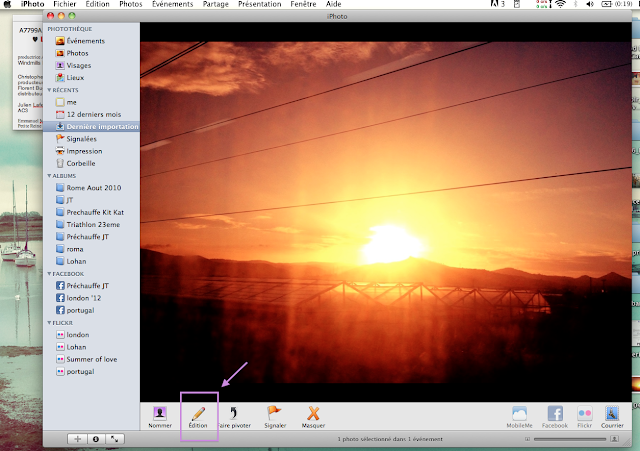
Open your photo on iPhoto and click on the edit button.
Choose the 'retouch' option
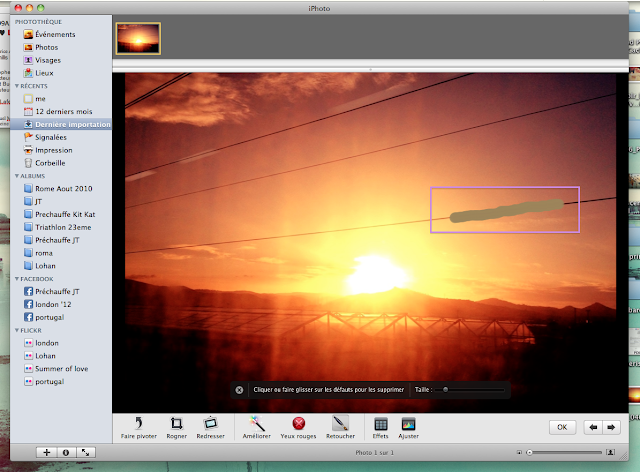
Choose the element you want to erase. In my case, the cables. Click once or click and drag to cover the element you want to erase. Note that you can adjust the width so you erase only what you want.
Release the mouse. The cable has disappeared, replaced by what should be underneath. Magical, right?
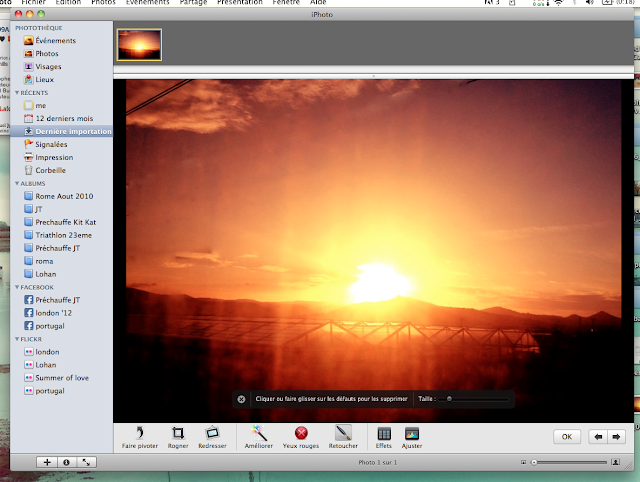
Keep on until you've erased everything you don't want to see on your photo.
IMPROVING YOUR PHOTOS WITH IPHOTO
Did you ever took a picture that felt perfect except for that one little detail that ruined it all? What if you could just erase that detail? Well you can, and it's how so simple!
I'm a Mac user, so i'm using iPhoto with this tutorial, but I'm sure some PC software propose the same thing (Photoshop does!!)
I took this sunset shot while on a train ride and ended up with a picture i really liked except for all those cables. Here's how i created a cable-free photo.


And here's my final shot, 5 minutes later!
The simpler your background is, the easiest it is. But pretty much everything is possible if you give it some time.
Here's another example, a bit more complicated since the background is busier. This time i used Photoshop CS4 which has similar tools, like the patch tool or the pattern stamp tool. I had this picture i quite like but the girl in the back really was on the way sooo i kinda erased her :)
Here's the before & after shot:
Simple, right? I'll be back tomorrow with a layout i did using this technique for my photo.
Until then, have fun editing!
Subscribe to:
Posts (Atom)